Monday, March 31, 2014
Shrimp Fried Rice

My favorite quick dinner recipe- shrimp fried rice with crisp veggies.
Tandoori chicken legs Drumsticke with barbeque masala

Chicken legs---7
Curd/Yoghurt---1cup
Tandoori barbecue/barbeque masala----4ts
salt to taste
chili powder---1ts
coriander powder--1ts
Lemon juice---4ts
paprika/red color--pinch
onions, cilantro and lemon for garnishing
Ginger garlic paste-2ts
Zip lock bag
Method:


- Remove skin and clean the chicken drumsticks.
- Make 6-7 deep cuts on each drumstick and keep aside
- Now prepare marination by adding all ingredients(Curd+BBQ masala+salt+chili powder+coriander powder+lemon juice+color) in a large bowl and beat them till it attains uniform color.(2-3min)
- Now coat each drum stick with this masala.
- Add remaining marination along with drum sticks in to zip-lock bag and close the bag.
- Mix by turning bag upside down 2-3 times.
- Keep this in the refrigerator and incubate overnight.(or minimum 2-6hrs)
- Next day, take the drumsticks out of the bag and place it on the tray that is warped with aluminium foil and greased with oil.
- Bake at 500F for 20-25min turning at regular intervals.
- Remove the drum sticks from the baking tray and arrange in plate and garnish with onions, cilantro and lemon.
- Enjoy with rice as a side dish/ have like evening snack.
I hope you like this recipe and please leave your comments as a token of appreciation. Thank you for visiting my blog, and keep visiting for more wonderful recipes.
Sunday, March 30, 2014
Bread kachori
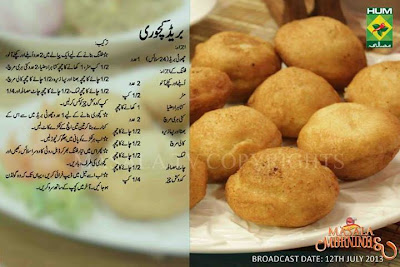
Ingredients
- Small bread 1 full (24 slices)
- Potatoes 2 boiled and coarsely mashed
- Peas ½ cup boiled
- Coriander leaves chopped 1 tbsp
- Green chilies chopped 2
- Roasted and crushed cumin ½ tsp
- Black pepper ½ tsp
- Salt ½ tsp
- Chat masala ½ tsp
- Cottage cheese grated ¼ cup
- Mix all in a bowl.
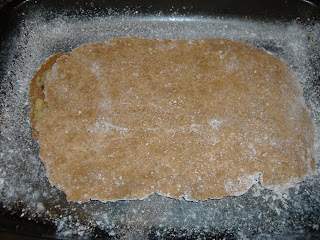
- Remove the crust from the bread cut into 3 inch round, dip each slice in water, squeeze it well, fill the potato mixture, cover with second slice, press firmly like kachori, deep fry in oil until golden, serve with ketchup.
Currant cookies Kúrenukökur
375 g butter, softened
375 g sugar
7 eggs, yolks and whites separated
a few drops of lemon essence
500 g flour
For decoration:
Currants, chopped blanched almonds, extra sugar (no amounts are given in the original recipe)
Cream sugar and butter, then add the egg yolks one by one, mixing well in between. Gradually add the flour, then the lemon essence. Whip the whites separately until stiff and fold into the dough.
Put the doughonto a baking sheet and spread evenly over the sheet, using a spatula. Sprinkle a mixture of currants, almonds and sugar on top. Bake at about 180°C until golden and cut into squares while still warm.
Chettinad Viral Meen mangai Kuzhambu Chettinad Butterfish murrel Mango gravy
 In my last blog, I really disappointed the non-veg lovers by showing a vegetarian fish. That was the case for the people at home too. So when Yesterday when I heard a voice ”Uyir Viral Meen Venumamma”, I ran to open the door and I saw a lady with a big shopper bag in her hand. Seeing her, I thought that I have misheard and asked her again what she was having. She replied that it was the live viral fish. Though I know that live viral fish is available in this part of tamilnadu during this month, I have never seen them live. Sometimes I have heard my husband after returning from the fish market telling that he got live fish. As he brings home the cleaned fish, it was the first time, I am seeing this live. Though it was Saturday and we don’t cook non-veg that day, I was eager to see and get the live ones. I asked for the price and she told that it is 160 Rs per kg. I had no idea of the price and simply told her “Oh, why this much costly”. Hearing me she suddenly got angry and told me,” I will give the whole thing free if you can get cheaper than this” and also that she is giving it for this price just because her husband caught it from a pond and she has no means to store it. I said Ok Ok and she opened the bag. Inside the bag 7 to 8 live fishes were playing inside a plastic bag filled with water. She took 2 big fishes and tried to keep them in the balance several times, and the fish jumped out of it each time. She caught it and kept it again and again. After 5 minutes she lost patience and asked me to bring a plastic bag. She put the fish inside the bag and weighed fast. She asked me” Are you going to cook today”. I said “No”. She asked me to bring a bucket with water, I thought the water was for cleaning but she put the fish inside that and asked for money. Now I understood why she put the fish in the bucket and I told her that, I want the fish to be cleaned and I can store it in the refrigerator. She went on arguing why, I want to refrigerate when I have a chance to have real fresh ones. The whole scene of me catching the live fish next day in my hand and running with it, and trying to kill it and clean it came into my mind and I laughed for myself and leaving my pride told her that, I don’t know to clean that fish.
 The next fun was seeing her cleaning the fish. The fish was a very slippery one and the lady found it very difficult to catch. She rubbed some mud over it and caught it by its neck so that it can’t move and took out the fins and the side first. Now she cut the head piece and put it inside the vessel. The blood was flowing and she cut the remaining pieces as well. Seeing the blood the real fun I was having till that time went off and I didn’t want to see her cutting the next one. So I went inside and made a cup of tea for her. She washed the fish nicely, had the tea, took the money and went off. I kept the fish inside the kitchen and thought that after sometime I can wash once more, marinate it and keep in the fridge.10 minutes before my husband comes for lunch, I went inside the kitchen to marinate the fish. When I touched the fish, I was shocked. It was slippery as if it is inside a gel. I was worried what to do and called home and asked our Akka what to do now. She told me that the fish should have been scrubbed with a stone or salt before cutting, but now she asked me to take each piece and scrub nicely with big salt spread on the kitchen slab. Oh; it took nearly one hour for me to do this. As I got tired by this itself, I didn’t grind any masala.I just marinated with 2 tablespoon of chili powder and salt and refrigerated it.
Today morning I took it out from the refrigerator and wanted to make an awesome curry with it to overcome the strain of cleaning it.
Viral meen head and tail along with mango is known to be very tasty. I have mangoes in my mango tree now as my tree will bear bruits only in this season. I went to the garden and plucked 2 mangoes and thought that I will take snaps however and if the curry turns good blog the recipe. Believe me, I have never had a fish curry so tasty. It was worth all the strain. The fish pieces inside were like coconut pieces, so fresh. There was a ton of difference between this fish and the frozen fish we get from the market. The procedure for the gravy is the same as for any other fish gravy. Only difference is that, as we are adding mangoes for the sour taste and so only very little tamarind is to be used.

Ingredients
Head and tail pieces of viral-6 pieces
Small onion-20
Garlic pods-20
Tomatoes-2
Mango-2 small ones
Tamarind-1 teaspoon
Chili powder-1 tablespoons
Coriander powder-2 table spoons
Turmeric powder-1 teaspoon

Marinate the fish pieces with ½ teaspoon salt and chili powder for 2 hours.
Cut the onion, garlic and tomatoes into small pieces.
Cut the mangoes into some big pieces. The seed can also be used as such
Keep the kadai in the stove. In two tablespoons of oil season the gravy with a teaspoon of fennel seeds, fenugreek seeds and curry leaf. Sauté the onion, garlic and tomato pieces nicely. Dissolve the tamarind juice in 3 to 4 cups of water. Add the chili powder, coriander powder, turmeric powder and the salt needed to this water. Add this water to the sautéed things in the kadai. Keep the flame in high and let the gravy cook for 5 minutes. Now reduce the flame to low and cook for 10 more minutes. Now add the mango pieces and cook for 3 minutes. Once the mango pieces are cooked slowly add the fish pieces one by one in such a way that they are inside the gravy. Now you can find that the gravy becomes little watery due to the high water content in the gravy. To give room for this extra water only we cook the gravy till it becomes thick before adding the fish. After adding the fish you cannot cook for a long time. The fish will get cooked within 7 minutes .Once you feel that the fish pieces are cooked switch off the stove. If desired a teaspoon of coconut oil can be added on top of the gravy to get extra flavor
Saturday, March 29, 2014
Potato Bajji Urulaikizhangu Bajji


Lemon Curd “Lite” Not Light

Speaking of relative, as I mention in the video, this would make a great holiday gift, so even if you’re not a big fan of lemon, pay attention nonetheless.
Friday, March 28, 2014
Cornmeal Pancakes
Delicious with maple syrup, honey, peanut butter, applesauce, applebutter, jam; all the usual pancake accompaniments in other words. These are a bit more solid and moist than regular pancakes with a nice delicate flavour. As always with pancakes, honestly: buttermilk is so much better than regular milk. It keeps extremely well (generally a couple of weeks past the date on the carton) and is useful in all kinds of baking. It should get used more often.
12 4" pancakes
40 minutes prep time

1 cup cooked cooled cornmeal mush
1 tablespoon sugar
2 eggs
1 cup flour
2 teaspoons baking powder
1/4 teaspoon salt
about 1 cup buttermilk or milk
mild vegetable oil to cook
Preheat the oven to 150° to 200°F. Put your plates in there to get warm.
Mix the sugar into leftover cornmeal mush. Beat in the eggs.
Mix the baking powder and salt into the flour, then beat it in.
Mix in the buttermilk to make a smooth, pourable batter. Start with 1/2 cup and add more as needed; 1 cup will probably be about right, but it depends on how thick your cornmeal turned out and how thick you would like your pancakes to be. You will likely need a bit more buttermilk than you would plain milk.
Cook in an oiled pan at pancake temperature for about 2 minutes on each side, until nicely browned. Keep them warm in the oven on the plates there until they are all cooked.
Last year at this time I made Paprika Soup.
Remove OMA Hystads recipes food cooking stain cleaning tips
This article is no recipes bar blends, but only need information, tips on cooking and hard to patch to remove cleaning tips.
BACK TO COOKING SCHOOL.
The General rules.
TENDER CUTS that can be cooked meat, dry heat, as in frying pan -
Frying or roasting.
TOUGH CUTS can only be made tender moist heat, as in pot roast and
Simmer.
Our main goal is to prevent shrinkage, as far as possible and
produce a tender, juicy, delicious Produkt.In roasting does little searing
Thus remains in juices, leads to less shrinkage at a lower temperature for
a longer time (300 F) .Sengendes however makes the meat look attractive and
the outer layers taste that is better.
A uptick pan with a rack in the lower offers the best results
Roasting. cooking time varies with preference.
For rare meat, 16 minutes per pound.
For medium-sized meat 22 minutes per pound.
Done for good meat, 30 minutes per pound.
Salt add during or after cooking, not vor.Der salt taste not penetrate.
more than 1 Zoll.Wenn meat the color achieved during the roasting,.
increase heat to (500 F) for a few minutes before removing from pan.
The searing methods is subject the meat a high temperature until it
is well browned.
Browing in an uncovered pan in a hot oven (450 F-powerful).
Browing in hot fat in a pan on the surface burner.
By adding boiling water and cook at temperature until the
outside of the meat has lost its red colour.
Why the kitchen meat
Taste to develop.
If any, in large quantities to mitigate the connective tissue.
All living organisms to kill can be present.
LIGHTSIDE
Teachers gave their class a test on birds. decided to test in a different way.
Rather then text you were with only your students images of birds, but with her legs.
The students had to figure out the legs to include the name of the birds.
A male student took a look on the test, grab the paper stormed the
Teachers desk, threw the paper on your desk and started to leave the room.
The teacher heard him and asked his Namen.Der student enabled
his pant leg raised and answered, find "you there".
One soup
When you buy a roast from the bone was trimmed, remember you pay
sue for the Knochen.Machen ask for it and use it to make broth or soup
Lager.Wann is cooked bones in water for a long time, a substance within.
It turns into gelatine.This dissolves in hot water and to the soup stock is available.
Soup stock is improved hinzufügen.Die are some meat hardest as sections such as the
economy, which are rich in gustative are best.Very little food is dissolved in water out
Use the soup meat in Left-Over Gerichte.Zur improve the taste add onions or Oxon cubes.
Brown the meat, improves the Geschmack.Bei Brown third-soup
the meat in bone marrow or fat.Add cold water to the bone to decken.Bis to the heat
Simmering temperature and cooking slowly for about 3 hours. vegetables can
in the last hour werden.Sellerie added sheets for added taste.
Reasons for the kitchen meat.
Taste to develop.
Mitigate the connective tissue.
From killing living beings.
OVEN ROAST.
Prepare meat in General cooking rules above.
Place on a rack in dripping pan and dig out meat.
Follow the General rules for roast you serve with Brown gravy.
Brown sauce.
Appreciate grease in the pan.
Add the same amount of flour with spice to taste.
Add boiling water to make the consistency of the medium white sauce.
Cook taste of raw starch to none.
Season with salt and pepper.
REMOVE STAINS
Before washing it is important that all stains removed werden.manchmal
SOAP or hot water determines a spot and make it impossible.
Berry stain, place the colored part about a pot and casting you of boiling water
about it from a height of 2 metres to the stain with strike
Kraft.Den dyed part above and down in the hot water up to overthrow the
Stain away do spot persistent is, use Javelle water.
Peach stains, you are not easy to entfernen.Achten wipe hands with
Peach spots on a good napkin, a towel or Schürze.Stretch stain on a pot
warm water and apply Javelle water with a medicine Dropper.Lassen you it is not
Water keep in touch with the fibres to lang.Javelle rots even cotton
and Bettwäsche.anwenden oxalic acid solution for the alkaline and rinse naturalize
thoroughly in hot Wasser.Mehrere applications may be necessary.
Tea and coffee stains.
Pass up the same procedures as for Berry stains.
Blood and meat juice.
Never put in hot water like the stain festlegt.Auf once cold soak
Wasser.Reiben with SOAP and waschen.Eine paste from raw strength mixed with cold
Water will remove these spots to flannel blankets and heavy goods.
Repeat until the stain disappears.
Wash egg spot in cold water, then warm water and SOAP.
Have a party? weight makes A difference.
If you have a party, provide food with drinks.
Provide non-alcoholic alternative materials such as such as fruit, soft drinks.
2 Drinks taken within one hour of a person 100 pounds produces a
Drink is equal to about 1.5 ounces of whisky or 2 075 lesen.Ein
Bottles Bier.Die rate reducing for every hour after
Stopped drinking 015.Eine is 200 pound person 1 drink
produced a reading of 019 so you can see, there is a big difference
due to weight.
It is your duty to ensure that nobody leaves your party hosts
beeinträchtigt.Haben some one way.
Disclaimer: The author of this article is not responsible for the accuracy or completeness, yet he shall be liable for any damage or loss of it arising from or in any way relating to the information or use.
BPW My postcard Sorry Im late
Ill be sending this to....


Would you believe it if I told you how difficult it is to find picture post-cards in Bombay? Half the shop-keepers didnt understand what it meant, and the others looked at me as if I had gone mad !
One guy asked me if i wanted a Picture of a postcard and the other said, you are the first person who has asked me for this since Ive opened my shop. I had almost given up hope when my dad went looking around for this one, he finally got me two cards that depict Bombays important landmarks.
The other hurdle I faced was due to my own forgetfulness. I was at my moms place whole of last week ( celebrating Varalakshmi nombu and devouring kozhakattais and vadais ), i had forgotten to carry the cord that connects the cam to the laptop. Hence couldnt post a pic of my card...Boo..hooo
Meeta told me I could post it when i reached my own place. And heres it..Im sending to A...friend hahaha
Its a picture of Flora Fountain. Completed in 1864, the Flora Fountain was erected by the Agri-Horticultural society of Western India out of a donation by Cursetjee Fardoonjee Parekh. Built in imported Portland stone, but now defaced with white oil paint, it was originally meant to be named after Sir Bartle Frere, then governor of Bombay. However, the name was changed before the fountain was unveiled. It stood in the center of the town as it then was. Now this area is the heart of the business district of the town.


This is what Mumbainet has to say about this structure-
"This is the very heart of Mumbai, circumscribed by stately colonial buildings that stand like proud old sentinels of a bygone era. Flora is the Roman Goddess of Flowers, her pretty alabaster face continually assaulted by grime and pollution. Next to her are a pair of torch bearing stone patriots that rise from the Martyrs Memorial nearby. Flora Fountain is now called Hutatma Chowk or Martyrs Square to honour those who died in the tumultuous birth of Maharashtra State. All around the square sit Mumbais infamous vendors selling just about everything under the blazing tropical sun -- from cheap nylon saris and ballpoint pens to herbal remedies and sexshop gewgaws. Tooting horns and traffic complete the chaotic picture, but through it all Flora manages to retain her serene composure."
Thursday, March 27, 2014
Healthy Date and Wheat Snacks
1 tbsp Set Honey

2 tbsp Healthy Margarine
1 Heaped tsp Almond Paste
1 Teaspoon Rice Flour
3 tbs Wholewheat Flour
Tiny Pinch Cinnamon
1 More tbsp Set Honey mix
4 tbsp Wholewheat
Hand Full Dates
Splash of Water and Honey
Melted Margarine
Mix 1 tbs of honey with the margarine and cream together, add the almond nut paste and mix well. Add the rice flour and sieve in 3 tbs of wholewheat flour with a tiny pinch of Cinnamon(you will be left with some wheat bits in the sieve, keep it to the side as it is added later) then add the other tbs of honey. It should form a doughy ball.

Then add 3 heaped tbs of whole wheat flour and the wheat bits from earlier. Rub together with your hands as thought to make (short crust pastry) a crumb like texture.
Then warm a little water with a little honey and mix in the dates, then pour the whole cup into one of the mixes and make into a biscuit dough. To make the plain dough just add a little water.

Roll the date mix flat and put onto your greased tray then spread with a little melted margarine(you can sprinkle on some grated coconut at this point if you wish) then roll the plain mix and put it on top of the date mix.
 Cut into whichever shape you wish and enjoy! :)
  RATATOUILLE - DVD Movie
Wednesday, March 26, 2014
Lodge LCC3 Logic Pre Seasoned Combo Cooker
 10-1/4", Pre-Seasoned, Cast Iron, Combination Deep Skillet and Shallow Skillet/Griddle With Lid.
Price: $41.99
Click here to buy from Amazon
Brauðterta – Icelandic style sandwich loaf Ham and egg
 |
| Decoration: Ham, canned peaches, tomato rose and cucumber strips. |
150 g mayonnaise
100 g sour cream
Aromat or Accent, to taste (may be left out)
Piquant seasoning
150 g thinly sliced ham
5 hard-boiled eggs
1/2 can green asparagus
Mix together mayo, cream and seasonings. Mash the eggs with a fork and chop the asparagus finely. Mix everything together. Put the spread between the layers of bread, spread mayo-sour cream evenly mixture over the loaf and cover with slices of ham. Garnish with, e.g. tomato roses, egg slices, cucumber, bell peppers, halved or quartered grapes, fresh parsley.
More decoration ideas:
 |
| Decoration: ham and red bell pepper. |
 |
| A roll. Decoration: ham, red and green bell peppers. |
 |
| A giant sandwich. Decoration: ham, canned peaches, red bell pepper strips, orange slices, asparagus and parsley. |
Tuesday, March 25, 2014
Idly Chilly Powder Idli Milagai Podi Gun Powder for Idli and Dosa

Cooking Grass Fed Beef Episode 4 – Beef Shanks Braised in Three Onion Broth
 This video recipe for Beef Shanks Braised in Three Onion Broth is the fourth in a series of videos Im doing that focus on cooking various cuts of grass-fed beef.
These beautiful beef shanks came from Steve Normanton, and were everything you want a braised shank to be -- moist, tender, sticky, and comforting.
As I looked around for ideas on how to do these grass-fed beef shanks, I knew I was going to slowly braise them (really the only way to go), but I couldnt decide what exactly to braise them in. So many options, so little time.
I saw a few recipes that called for the shanks to be cooked in a broth made from instant onion soup packets. As much as the thought of taking these wonderfully wholesome, all-natural, grass-fed shanks and sticking them in a sodium-packed, MSG-laced, artificially flavored and colored, dry soup mix repulsed me, the idea of cooking them in a French onion soup sounded pretty good.
 It was better than pretty good -- it was fantastic! The collagen-rich shanks broke down beautifully and the combination of those succulent chucks of meat, sweet melted onions, buttery marrow, and rich aromatic sauce over the soft polenta, made for a very impressive bowl of food.
As I mention in the video, beef shanks are like a two-for-one deal. Not only do you get the marvelous meat, but you also get one marrowbone per shank! If youve never had beef marrow before, do yourself a favor and get some beef shanks and make this recipe.
Thanks to Steve Normanton as usual for providing such great beef to work with. By the way, those of you who want to cook with grass-fed beef, but dont like it medium-rare, should give this beef shank recipe a try -- its basically impossible for the dish not to be delicious. Enjoy!
Ingredients:
2 tbsp vegetable oil
4 beef shanks (about 1 1/2-inch thick)
3 large onions
1 bay leave
6 springs thyme
3 cloves garlic, chopped
2 sprigs rosemary
1/2 cup diced carrot
1/2 cup diced celery
salt and fresh ground black pepper to taste
2 cups beef broth
chives to garnish
Hyderabadi Mirchi ka Salan

Ingredients:
- 8 to 10 jalapeno pepper medium size
- 1/2 cup peanuts
- 2 tablespoon sesame seeds
- 2 tablespoon grated coconut
- 1 large onion
- 1/4 cup oil
- 1 teaspoon mustard seeds
- 1 teaspoon ginger garlic paste
- 1 tablespoon cumin- coriander powder
- 1/2 teaspoon red chili powder
- 1/2 teaspoon turmeric powder
- 1/2 teaspoon garam masala powder
- 1 tablespoon tamarind pulp
- 1 teaspoon brown sugar
- Salt to taste
- 3 cup water

- Wash, wipe and slit green chilies lengthwise without cutting the chilies into two. (take out the seeds).
- In heavy bottomed skillet dry roast sesame seeds till they get light golden and set aside. In the same pan add the peanuts roast, set aside.
- Add in the grated coconut stir and switch off the flame. Set aside.
- In a non stick pan add 2 tbsp oil and add chopped onion cook until they get light brown.
- Allow to cool onion than add tamarind, turmeric, peanuts, coconut, sesame seeds, ginger garlic paste, salt and 1 cup water and blend to a smooth paste.
- In a wide skillet, heat about a tablespoon of oil. Bring the oil to smoking point. Add and sear jalapenos to sand color. Take care not to black or burn.
- In the same pan add the remaining oil and add mustard seeds and let it splutter. Add in the prepared Salan (paste) and water and stir.
- Add red chili powder, cumin-coriander powder and garam masala and mix well..
- Add in the fried jalapeno mix well. Cover the pan and let it cook for 10 minutes on medium heat while stirring in between.
- Serve hot with rice, parathas or biryani.
Monday, March 24, 2014
Kavuni Arisi A special Chettinad Sweet

This is a chettinad sweet delicacy which I think can be had only here. I understand what is going in everybody’s mind now. What is it special? Why it can be had mainly in chettinad only? The answer to these questions are, Mainly this sweet is made out of a special kind of rice grown in this region ,which after grinding will be red in color and will be needle like. Don’t confuse this rice with the red (kaikuthal Arisi) available in Kerala. I come to know that a very fine quality of this rice is available in Singapore. Once you have this rice, preparation is very simple. This rice after cooking will be sticky. That is the quality that makes it ideal for a sweet. In chettinad we get this rice hand grinded also.

Ingredients
Kavuni Arisi-1 cup
Sugar-1/2 cup (according to taste)
Ghee-1 table spoon
Grated coconut-2 tablespoon
Cardomom-4 or 5
Procedure
This rice is little difficult to get cooked. So soak the rice for 3 to 4 hours before preparing. Pressure cook the rice adding 3 cups of water in medium fire for 10 to 12 minutes. The rice should be cooked very soft till the white pulp in the red outer shell of the rice comes out. After opening the cooker if you find it not properly cooked, Cook for some more time. Try to smash the rice with a ladle when the heat is there. If there is excess water, strain it. After smashing, add the sugar checking for the taste in between. Powder the cardamom with a teaspoon of sugar. Add that along with the ghee and mix well. The sweet is ready. If you find the rice you are using needs more water to cook, add more next time and vice versa
Sunday, March 23, 2014
Paneer Korma Paneer Kurma Restaurant Style
 |
| Paneer Korma Resturant Style |
Paneer / Indian Cottage Cheese - 2 cups
Onion chopped - 1 no
Tomatoes - 2 no
Ginger and garlic paste - 1 tsp
Red chilli powder - 1 and 1/4 tsp
Turmeric powder - 1/4 tsp
Garam masala powder - 1 tsp
Kasuri methi leaves - 1 tsp
Cashew nuts - 5 nos
Roasted Poppy seeds - 1 tsp
Grated coconut - 2 tbsp
Cardamom - 2 pods
Butter - 2 tbsp
Fresh thick cream - 1/4 cup
Salt to taste
 |
| Paneer Kurma for Chapathi |
1. Chop the paneer into cubes, deep fry in oil until lightly browned, drain and set aside( or soak paneer cubes in hot water for 10 mins, drain and set aside to make it soft).
2. Blanch the tomatoes in hot water for 10 minutes or until skin of tomato slightly shrinks. Remove tomatoes skin and chop it coarsely.
3. Heat 1 tbsp butter in a pan, when butter starts to melt add chopped onions and sauté till onions are soft.
4. Add the ginger and garlic paste to the pan and sauté until raw smell leaves.
5. Add the blanched and chopped tomatoes, cardamom, red chilli powder, turmeric powder, garam masala powder, cashew nuts, poppy seeds and grated coconut to the pan, stir well for 3 minutes on low heat. Remove pan from heat and allow mixture to cool.
6. Once tomato mixtures reaches room temperature, grind this mixture in blender until smooth.
7. Wipe the same pan and return to heat, add 1 tbsp butter and add the ground masala paste, stir well on low heat.
8. Add 1 cup water to the pan, stir well and loosen the gravy.
9. Increase heat bring gravy to boil, add paneer cubes to boiling gravy and season with required salt. Let the korma boil for 2 minutes.
10. Finally garnish paneer korma with crushed kasuri methi and thick cream, stir well and serve with ghee rice or hot pulkas.
Chefs tips
1. Since everyone in my home loves paneer I used 2 cups you can use 1 to 1.5 cups paneer for this recipe.
2. Using fresh cream gives richness to the recipe, its optional to use cream.
3. I used Kashmiri red chilli powder in this recipe to get bright orange color, if using ordinary red chilli powder use food color to get the color.
Balsamic Glazed Oven Dried Tomato and Carmelized Green Pepper and Onion Pizza


Hot Pepper Spiked Garlic Olive Oil
Fruit custard cake

Ingredients
- Sugar 200g
- Eggs 5
- Flour 200g
- Baking powder 1tbsp
- Butter 150g
- Raisins 100g
- For the custard
- Milk 1/2l
- Custard powder 5tbsp
- China grass 1/2packet
- Vanilla essence a few drops
- Fruit cocktail 1/2cup
- In a bowl beat together the sugar and eggs until a mixture of uniform consistency is reached.When the sugar granules completely dissolves sift in the flour and baking powder. Mix well and add the melted butter and raisins. Using a spatula fold gently and pour the batter into a cake mold.Bake at 180C for 30-35 minutes or until the cake has risen and is golden brown in color.Remove the cake and cool on a cooling rack. Now cut through the middle of the cake to form two layers.
- Place one layer inside the mould and keep the other layer aside.Heat the milk in a saucepan and add the china grass and sugar .When the ingredients have dissolved and the milk begins to boil stir in the custard powder .Continue stirring until the milk thickens. Add a few drops of vanilla essence .turn the flame off.
- Pour the fruit cocktail onto the cake layer in the mould followed by the warm custard. Top the custard with the other layer of cake. Spread a thin layer of custard on top and place in the refrigerator.After half an hour, remove the cake from the mould , cut the cake into slices and serve.
Saturday, March 22, 2014
Dish of the Month March 2013

Its time to launch another month of Dish of the Month a blog event to celebrate the recipes of Nigel Slater. If you tweet your recipe @realnigelslater he might even reply to you some of last months entrants found out. Check it out in the February Dish of the Month round up. Some of us are cooking our way month by month through The kitchen diaries II, however you can make any dish from any of Nigels books or use the on line recipes. The full rules are shown at the bottom of the post.
My Dish of the Month for is from March 16th in the Kitchen Diaries II. its an adaptation of Nigels Pork shoulder with ginger and anise. I didnt have a pork shoulder, but I did have two huge and delicious Saddleback Pork Chops provided to me for review by Farmison its a really simple slow cooked recipe packed with flavour.
 |
| All the gorgeous meat I got from the two Saddleback Pork Chops |
This month I am delighted to say that one entrant will win a 2.8L Stainless Steel Mixing Bowl and a Medium Silicone Spatula from the lovely people at OXO Good Grips. Products from OXO Good Grips are of the highest standards of design and manufacture, a delight to own and use. The winner will be chosen by Random Number Generator when the Linky closes on 28th March. The prize draw is for UK residents only but anyone can join in and share their recipe on the Dish of the Month Linky.


If you would like to take part, then please:
- Make a Dish of the Month from ANY recipe by Nigel Slater
- Link to Farmersgirl Kitchen or A Little Bit of Heaven on a Plate
- Use the Dish of the Month logo in your post
- If you use twitter, tweet your post with @serialcrafter or @Heavenona_plate and #DishoftheMonth and we will re-tweet it to our followers.
- If you own The kitchen diaries II please do not publish the recipes on your blog without permission, they are copyright.
- If you are using recipes from the BBC Food website, please link to the recipe on BBC Food rather than publishing the recipe. Likewise recipes on the Guardian Lifestyle website.
- One entry per blog.
- Recipes must be added to the linky by the 28th of each month.

The round up for Dish of the Month is now live over at A little bit of Heaven on a Plate
Add your Dish of the Month to the linky below:
);
Caraway coffee Kúmenkaffi
-For a truly adult version of caraway coffee, make a "Black Russian" with fresh, hot coffee and use brennivín instead of vodka. To add a bit of brennivín ("að gefa út í") is a tradition still honoured by some Icelanders, and there are stories of caraway coffee sometimes arousing the (happy) suspicion that the hostess has put "a little something extra" in the coffee.
Friday, March 21, 2014
A Meme
Happy - I try to be happy about things in life because even when things are not so good, you can always be in a worse situation than the one your currently in. I think its best to laugh at the silly things in life rather than stress over them. We cant be happy 24/7 but I think it sure is a great idea to try!
Oats - I eat oats for my breakfast at least 3-4 times a week. Porridge is my favourite breakfast of all time! It all started one winter when we were kids and we ate a lot of porridge for snacks because it was warm. I have ate it ever since and love it.
Nature - I love nature, animals and plants etc are fascinating to me. I love breathing in the fresh air of the out doors. There are a lot of beautiful places in the world, where ever there is nature I think there is beauty. :)
Everlasting Love - I love my husband and kids soooo much! The love I feel for my family is ever lasting and so very precious. That is why it is great to enjoy cooking so I can please my family and make them happy with what I cook for them. Eating is a privilege in this world that is why it is good to enjoy your food and have fun with it. :)
Yellow - Egg yolks, Honey, Buttercups, Sunflowers, ducks, lemons and so many more reasons to like this colour. Its bright and vibrant and one of my favourite colours.
I hope you liked reading the 5 things about myself. Now my job is to tag some more bloggers so we can all get to know some more people better. So here are my tags...
Seena from Simple and Delicious
Padma from Padmas Kitchen
Seec from En Samayal Arai
Deepa from Deepas Kitchen
Nags from For the Cook in Me
I had fun doing this post thank you Mansi. :)
Health Bar Recipe Healthy Flapjacks Recipe
My delicious Health Bar Recipe snack is also known as Flapjacks!
This is a very healthy recipe that I like to bake often, not only for its wonderful taste but for the high Iron and B Vitamin content that will give you a real energy boost, great for busy people OR hard working busy mums/food blogger .. ..like me !! :-) .
I do not use any sugar in this recipe as I only use molasses and fruit to sweeten these health bars and the result is the perfect sweetness that is good for you.
The textures of crunchiness and chewiness and the lovely flavour of the molasses is just adorable and I know you will love them too as the taste is outstanding.
Jeenas health bars is a healthy treat to snack on that will leave you feeling very satisfied this is because they are very nutritious, my healthbar recipe are so tasty that you will want to eat up the lot in one go....
So lets now enter Jeenas Kitchen and lets get baking- enjoy !


3 Large Tbsp Molasses
2 Level Tbsp Low Fat Margarine
1 Cup Oats
Pinch Sultanas
Pinch Raisins
2 Handfuls Pumpkin Seeds
8 Dates (stones removed and chopped)
Getting Started on Jeenas Health Bar Recipe..


When they are cooked leave the health bars to cool on the tray. You do this to keep the shape of the flapjack, if you remove them from the tray whilst hot they will crumble.


Check out Jeenas other easy homemade: Chocolate health bar recipe
*****************************************************
Healthy baking can be good for you as you can see from this tasty healthy bar recipe and you do not have to buy them from the shops to enjoy the wonderful home cooked taste.
Have you ever made home made health bars ? How would you like to bake yours ?

Thank you for visiting "Jeenas Kitchen" food recipe photo cook book blog.
I update my food blog on a daily basis and will have many more NEW recipes to post.
Do keep on re-visiting Jeenas Kitchen and do spread the word about my site by telling your family or friends about me as the more people who know about my food recipe photo cook book blog the more people can enjoy some delicious FREE recipes from Jeenas Kitchen !!
Your welcome to add a link from your website to mine or to e-mail others about Jeenas Kitchen.
Bookmark my food recipe blog as we have many more "flapjack and health bar recipes" for you ! : http://www.Jeenaskitchen.
Feel free to make a comment about this recipe by simply clicking the comments link below, you do not need to be registered to place a comment...it is that easy !
See you again next time.